A workstation is a system: screen, desk, posture, and cabling working together. Buy a great monitor and mount it wrong, and you have bought neck pain. This hub walks through the whole build in five steps — from picking screens to the cable decisions that quietly cap your refresh rate — with our full setup guides linked at every stage.

Step 1: Pick the right screens
Everything else depends on this choice. Our best monitors hub maps the whole 2026 market by size and use case — the short version: 27 inch 1440p is the all-round sweet spot, 24 inch is the sharp budget classic, 34 inch ultrawides replace dual-monitor rigs from ~$230, and 4K now starts under $300 for design and console work.
Consider the shape of your work, not just the size: programmers and writers often get more from one landscape screen plus one vertical monitor than from two matched landscape panels. Laptop-first workers should prioritize USB-C docking models — one cable carries video, charging, and peripherals.
Step 2: Position the screens correctly
Placement is free ergonomics — and the most skipped step. The targets that matter:
| Screen size | Viewing distance | Top edge height | Center height |
|---|---|---|---|
| 24 inch | 50–65 cm | At or just below eye level | ~5–10 cm below eye level |
| 27 inch | 60–80 cm | At or just below eye level | ~5–10 cm below eye level |
| 32–34 inch | 75–90 cm | At eye level (curve helps edges) | ~10 cm below eye level |
| 49 inch super ultrawide | 90–100 cm | Center-weighted; avoid looking up | Directly ahead |
For two-screen arrangements — landscape pairs, landscape-plus-portrait, laptop-plus-external — the dual monitor workspace guide for freelancers covers the layouts that survive real rooms, including which screen should be primary and how far apart to split your work.
Step 3: Get the ergonomics right
The monitor is half the ergonomic equation; chair height, desk depth, and break rhythm complete it. The full measurements and the mistakes almost everyone makes (screens too high, laptops as primary displays, wrong chair-to-desk distance) are in our ergonomic desk setup guide.
One rule to take away now: your neck should stay neutral. If you look up at the screen or down at a laptop for hours, no monitor spec will save your spine — raise the screen (or raise the laptop on a stand and add an external keyboard).
Step 4: Mount or stand?
Every monitor worth buying in 2026 carries a VESA 100×100 mount. A good arm buys back desk depth, adds portrait rotation, and makes multi-monitor alignment trivial — ultrawides need higher-weight-capacity models. The full picks, from budget arms to heavy-duty wall mounts, are in our monitor wall mount and arm guide.
Step 5: Connect it properly
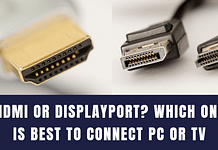
Cables are where good setups silently break: a high-refresh panel on an old HDMI cable runs at 60Hz and nobody notices for months. The bandwidth table:
| Cable | Max at 1440p | Max at 4K | Notes |
|---|---|---|---|
| HDMI 1.4 | 144Hz | 30Hz | Legacy — avoid for 4K |
| HDMI 2.0 | 240Hz | 60Hz | Fine for 4K office; caps console VRR features |
| HDMI 2.1 | 240Hz+ | 120Hz+ | Required for PS5/Xbox 4K/120 |
| DisplayPort 1.2 | 165Hz | 75Hz | PC standard for years |
| DisplayPort 1.4 | 240Hz+ | 120Hz (with DSC) | Best for high-refresh PC gaming |
| USB-C (DP Alt Mode) | Depends on DP version | Depends on DP version | Video + laptop power in one cable |
The full decision — which port to use on which device, and why monitors behave differently on each — is in our HDMI vs DisplayPort guide. For laptop docks and adapters, the USB-C adapter guide explains DisplayPort Alt Mode versus plain USB-C, and why the included cable usually matters more than the box specs.
Step 6 (optional): Tune it like a pro
Three quick settings upgrades after the hardware is placed:
- Comfort: enable flicker-free dimming and low blue light for evening sessions — what these features actually do is in our flicker-free explainer.
- Color: even budget panels improve dramatically with calibration — the free OS tools through hardware colorimeters are covered in our monitor calibration guide.
- OS layout: set scaling per screen (Windows: Display settings; macOS: Displays), snap windows to zones, and assign your primary display thoughtfully — five minutes that pays back daily.
The quick workstation checklist
- Top of the screen at (or slightly below) eye level — raise the stand or add an arm if you look up.
- Arm’s-length viewing distance for 27–32 inch screens; farther for super ultrawides.
- Laptop on a stand with an external keyboard if it is part of the setup — never as the primary screen for full days.
- Right cable for the refresh rate — verify in GPU settings that the panel actually runs at its rated Hz.
- One cable per device where possible — USB-C dock monitors make this easy.
- Secondary screen earns its place — chat, email, documentation, or portrait code; if it only shows a screensaver, rotate it or repurpose it.
Frequently asked questions
Is a dual monitor setup still worth it, or is one ultrawide better?
For most people one 34 inch ultrawide now wins: no center bezel, one cable, one stand. Dual screens still win when you need portrait orientation (code, documents), different heights, or two full-screen sources. Both routes are covered in the dual monitor layout guide and the size guides in our monitors hub.
How far should my monitor be from my face?
Roughly arm’s length: 60–80 cm for a 27 inch screen, 75–90 cm for 32–34 inch panels. If you lean in to read text, increase OS scaling instead of moving the screen closer — your posture will thank you.
Do I need a monitor arm?
Not strictly — a height-adjustable stand covers the basics. An arm becomes worth it when you want the desk depth back, need portrait rotation, run multiple monitors that must align perfectly, or your stand is tilt-only. Options for every budget are in the mount and arm guide.
Why does my 144Hz monitor feel like 60Hz?
Nine times out of ten it is the cable or the port: an old HDMI cable or the wrong GPU output caps the refresh rate silently. Check the bandwidth table above, verify the Hz in your GPU control panel, and see the HDMI vs DisplayPort guide for the fix.
Still choosing screens? Start at the best monitors hub, pick your size and use case, then come back and build the desk around them — that order never fails.