
There are many emulators out there that you can use to emulate a mobile device on your PC, but Genymotion is one of the best.
Today in this article, I will show How to set up Genymotion’s most popular fast & easy android Emulator call Genymotion. First of all, if you’re doing an android developer and not using Genymotion.
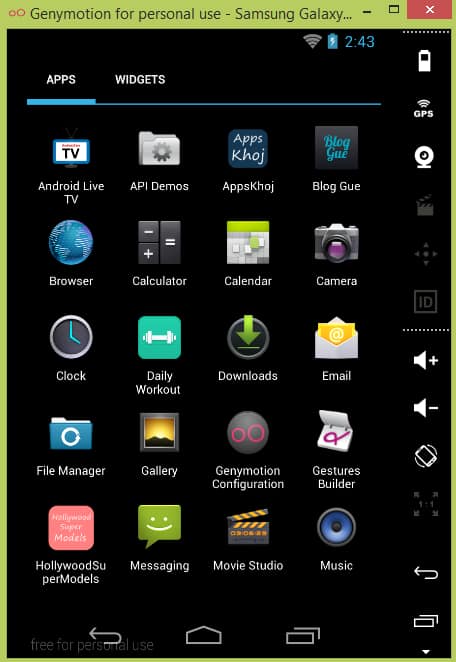
GET IT! The thing is blindingly fast, faster than my Galaxy S4 device. Look Like a Real Android Phone Environment.
In this article
- About Genymotion
- Genymotion Common Feature:
- Genymotion Setup requirements
- For Windows
- For Mac OS X – Genymotion for Mac installation instructions
- For Linux
- Installation Genymotion
- Configure Genymotion with Android Studio:
- This tutorial shows how to install Genymotion on Windows 10/8/7/Vista/XP.
- Extra Tips for Genymotion devices
- Install Failed CPU :
- Unable To Start Genymotion Virtual Device – Virtualbox Host-Only Ethernet Adapter Failed To Start
- Unable To Create Genymotion Virtual Device
- Genymotion Does Not Start Android Virtual Device
- Genymotion Player.Exe Stopped Working
- Frequency ask question
- Conclusion
About Genymotion
Genymotion is an Android emulator that you can use to emulate a mobile device on your PC. This method allows developers, engineers, and testers to test their apps in different environments without having access to the actual instruments they need.
In other words, it’s as if we were testing our app on an iPhone. Still, instead of using real hardware, Genymotion android emulates all the functions of an iOS environment so that any issues are found before they affect users with those specific devices. You can download Genymotion for free from Google Play Store or direct from the Genymotions website.
Genymotion Common Feature:
- Genymotion has a graphical user interface that is very easy to use, and it provides more features than the other emulators.
- You can emulate various devices like the Apple iPhone, Google Nexus, or Samsung Galaxy S II.
- It supports many Android versions (from Gingerbread up to Marshmallow), so you don’t need additional plugins for your testing needs.
- The emulator includes USB emulation, which allows you to connect virtually any device on the market – from Bluetooth keyboards & mice to external storage drives and even printers! This way, all your apps will work as expected no matter what type of hardware they’re being tested with.
Genymotion Setup requirements
Genymotion is available for Windows, Mac OS X, and Linux. Requirements vary depending on the operating system you’re using, so we will cover them separately:
– For Windows, Genymotion requires at least a Pentium Core I CPU with two cores or more, an Intel chipset (GMA950 or above) GPU with hardware acceleration enabled in BIOS settings, and running DirectX 11 as well as at least one USB port to connect your devices.
Memory requirements are also higher than what most people would recommend, but it varies from computer to computer.
The minimum requirement is 16GBs of RAM though I would recommend 32 GBs if possible.- On macOS, Genymotion runs on any 64-bit architecture Macintosh powered by an Intel processor.
Like Windows, it requires at least 16GB of RAM.
– For Linux (Ubuntu and Fedora tested), Genymotion doesn’t seem to have any particular requirements. Still, the team recommends a CPU with two cores or more for best performance and an NVIDIA or AMD graphics card that supports OpenGL|ES hardware acceleration.
Note: if you don’t have a Graphic card, you can’t use Genymotion on your computer.
First, you need to check the requirements:
- Identify your Intel® Graphics Controller See here
- Oracle VirtualBox >= 4.2.12 (greater is better)
To use Genymotion, you need Oracle VirtualBox. Suppose you don’t already have VirtualBox installed. Then please install VirtualBox Then try to install Genymotion.
Download and Install Oracle VirtualBox
- Read the following section.
For Windows
The easiest way to install VirtualBox is to download the Genymotion package that contains the VirtualBox installer here.
For Mac OS X – Genymotion for Mac installation instructions
Go to the VirtualBox download page and get the Mac OS X .dmg file. Open the .dmg file and follow the installation steps. When finished, reboot.
For Linux
Check your repositories: almost every GNU/Linux has a package installer for VirtualBox. If not, or if you need to install a specific version, go to the VirtualBox download page.
Installation Genymotion
You will have to head over to the Genymotion website and register a user account to get started. You will be able to download the installer after registration.
1. Go to the Genymotion register page
2. In the signup form, fill the fields with your personal information.
3. Click the “SIGN UP” button
4. You will receive a validation E-mail. Click on the validation link to finish
5. You will receive another e-mail indicating that your registration is now complete.
To see the complete Installation Genymotion, Please See genymotion official page installation article.
Configure Genymotion with Android Studio:
- Download the genymotion-idea-plugin-20130716.jar plugin from the link genymotion.com/plugins
- Open Android Studio IDE
- Open File->Settings ->Plugins
- Choose Install plugin from disk and choose the downloaded genymotion-idea-plugin-20130716.jar
- Now Apply Changes
- In Android Studio, select Run->Edit configurations
- Select Target device as Show chooser dialog.
- Now, you can test your Application in Genymotion by choosing Genymotion from the Choose Device dialog while running your Application.

This tutorial shows how to install Genymotion on Windows 10/8/7/Vista/XP.
Step 1: Download and Install Genymotion
Download the latest version of Genymotion from the official site.
Once downloaded, extract the zip file and run the setup wizard.
Select the “Create Virtual Device” option and follow the instructions.
Select the “Install” option when prompted.
If you get an error message like “No valid SDK was found”, then try downloading again and reinstallation.
Step 2: Create a Virtual Device
Now click on the “Virtual Devices” tab and select “New”.
Give a name to your virtual device and choose the type of device (phone or tablet).
Choose the screen size and resolution.
Click on “Next” button.
Now, select the operating system for which you want to create a virtual device. Choose either Windows, Mac OSX, Linux, iOS, or Android.
For Android, you have two options:
a) Select “Android 6.0” if you want to emulate Nexus 5x, Pixel XL, Samsung Galaxy S6, LG G5, HTC One M9, OnePlus 3T, etc.
b) Select “Android 7.1” if you want to simulate Samsung Galaxy Note 4, Samsung Galaxy S7 Edge, Xiaomi Mi Note Pro, Huawei Mate 9, etc.
Step 3: Start Creating Your Virtual Device
After selecting the desired platform, now start creating your virtual device by clicking on “Start”.
The first step is to add a virtual SD card. Click on the “Add SD Card” button.
A dialog box will appear where you can browse for the location of your SD card.
Then click on the “OK” button to continue.
The next step is to configure the network settings. To do this, click on the “Network Settings” button.
Here you can change the IP address, DNS server, proxy server, etc.
To save time, you can skip these steps and just go ahead with the rest of the configuration.
Step 4: Configure Network Settings
Now, click on the “Advanced” button in order to configure more advanced features such as WiFi, VPN, etc.
Step 5: Add Hardware Acceleration
In case you’re using a laptop or desktop computer, you may not be able to use Genymotion because it doesn’t support GPU acceleration.
However, there is a workaround available. By default, Genymotion only supports Intel x86 processors.
But, you can enable GPU acceleration by following the below steps.
Go back to the main window and click on the “Hardware Acceleration” button.
From here, you’ll see an option called “Enable hardware acceleration”.
Check this option and click on the “Apply” button.
Step 6: Set Up USB Debugging
Now, we need to turn on USB debugging mode so that you can connect your phone to your PC.
Open the Genymotion app and click on the “Settings” icon. Now scroll down until you find “USB Debugging”.
Turn on this option and click on OK.
Step 7: Connect Your Phone
You’ve successfully configured all the required configurations. Now, connect your phone to your computer via USB cable.
Your phone should automatically detect the connection and ask you whether you want to allow access to your files.
Allow the connection and wait for the process to complete.
Step 8: Run Genymotion App
Once connected, open the Genymotion app on your phone. You should see a message saying “Connected to Genymotion!“.
If everything went well, you should see a pop-up notification saying “Ready!”
Congratulations! You’ve created your very own Android emulator.
Extra Tips for Genymotion devices
To install the app: you have to download the apk file (either from the browser within the emulator or on your desktop) and install it the usual way. The Play Store is not available in the emulator, but you can sideload apps (download here).
If you have Android SDK installed and configured Genymotion to point to the Android SDK folder, you can drag and drop the apk file to the emulator to install/flash it.
Install Failed CPU :
- If you see the “INSTALL_FAILED_CPU_ABI_INCOMPATIBLE” message, you will need to install the “Genymotion-ARM-Translation.zip” (download from this post) before you can install the Google apps.

It is an excellent way for developers to test apps and for users to play with Android. Be sure to tell us what you think about virtual Android on PC in the comments below.
Unable To Start Genymotion Virtual Device – Virtualbox Host-Only Ethernet Adapter Failed To Start
If you are unable to start Genymotion virtual device, then you need to check whether you have installed VirtualBox correctly. If you have already installed VirtualBox, then you need to uninstall it first. Then, you need to install VirtualBox again. After that, you need to restart your computer.
See the solution:http://stackoverflow.com/questions/19106436/
Unable To Create Genymotion Virtual Device
If you are unable to create a genymotion virtual device, then you need to install Android SDK tools first.
Then download the latest version of genymotion from https://www.genymotion.com/download/. After downloading the file, open the folder where you downloaded the file and run the setup.exe file.
See the solution: http://stackoverflow.com/questions/17540311/
Genymotion Does Not Start Android Virtual Device
If you are using Genymotion 2.0.1, then you may encounter the problem of “Genymotion does not start Android virtual device”. This issue occurs when you try to use Genymotion to create an AVD for testing apps. The solution is to update Genymotion to version 2.2.1.
See the solution: http://stackoverflow.com/questions/19700646/
Genymotion Player.Exe Stopped Working
If you are using Genymotion Player.exe, then you need to uninstall it from your computer.
To do this.
Go to Start Menu > Settings > Apps > All apps > Uninstall Genymotion Player.
http://stackoverflow.com/questions/20727538/genymotion-player-exe-stoped-working
Frequency ask question
How to access local files from AndroVM (GenyMotion)?
To access local files from Andriod VM, you need to use the “adb” command. The ADB command is used to transfer data between Android devices and computers and the genymotion cloud. To access local files from Genymotion, you need to run the following commands:
$ cd /data/local/tmpDoes Genymotion Desktop work on Mac M1?
Yes, Genymotion Desktop works on Mac M1. However, you need to install VirtualBox first.
What should you do before uninstalling Genymotion emulator?
Before uninstalling Genymobile, you need to close all running apps and delete the app data from the device.
If you want to uninstall Genymotion, Go to Settings > Apps > All > Uninstall.
Or you can use any uninstall tool.
How to Manually Delete Genymotion Leftovers?
If you want to delete all the leftover files from Genymotion, you need to go into the folder where you installed Genymotion and delete all the files inside.
How To Uninstall Genymotion from Mac OS?
If you want to uninstall Genymotion from Mac, then follow these steps:
- Open Finder
- Go to the Applications folder
Does Genymotion work on Mac?
Yes, Genymotion works on Mac OS X 10.10 Yosemite and later.
How can I get Genymotion for free?
If you want to download Genymotion for free, you need to follow these steps:
- Go to Google Play Store
- Search for “Genymotion”
- Click on “Free”
- Download the app
- Enjoy!
Is Genymotion free to use?
Yes, Genymotion is entirely free to use. However, you need to register for an account at genymotion.com to download the app.
What is the size of Genymotion?
The size of Genymotion is about 1GB.
How do I start Genymotion on Mac?
To start Genymotion on mac, first, download the Android SDK from https://developer.android.com/studio/index.html. Then open the terminal and run the command “./tools/genymotion” to create a virtual device.
Is Genymotion good for gaming?
Yes, Genymotion is great for Android game development. It allows you to run multiple emulators at once, making it easier to test different versions of Android. The emulator also has a built-in debugger, which helps you debug your app.
What is Genymotion for personal use?
Genymotion is a virtual device emulator that allows you to run Android apps on your computer. It means that you can test your app on different devices without physically installing them on your phone.
Why Genymotion is not working?
If you are using Genymotion for Android development, then you may be experiencing some issues. The first thing you should do is check whether you have installed the latest version of Genymotion.
If you have already done that, then try uninstalling and reinstalling Genymotion. If that doesn’t work, then you need to contact the Genymotion support team.
How can I get Genymotion?
Genymotion is a virtual machine for Android development. It allows you to run Android apps on your computer. The best way to get Genymotion is to download it from Google Play Store.
Conclusion
Setting up Genymotion for the first time can be a little daunting, but it’s not too hard. In many ways, I will explain the setup process in this article. So if you are new to android development or just starting out with android development, you must read this post until the end.
I hope you like my article on how to install Genymotion. Please share your thoughts in the comments section below. I hope this article will help you to install Genymotion on Windows 7 or 8.10.
")


")


")